How to align shapes in PowerPoint: Mastering the finesse of achieving a coherent look
When creating presentations in PowerPoint, it’s essential to have a clean and organized design. One way to achieve this is by aligning your objects properly.
In this guide, we’ll show you how to align objects in PowerPoint so that your presentations look polished and professional.
Why Aligning Objects is Important
Aligning objects in PowerPoint is essential for several reasons.
First, it helps you create a clean and organized design for your PowerPoint presentation, which makes it easier for your audience to understand your message.
Second, it can help you save time when creating presentations by allowing you to align multiple objects quickly.
Finally, aligning shapes and other objects neatly can help you achieve a professional look, even if you’re not a designer.
Understanding Alignment in PowerPoint
Before we dive into how to align objects in PowerPoint, it’s essential to understand the different alignment options available. PowerPoint has several possibilities, including Align Left, Align Center, Align Right, Align Top, Align Middle, and Align Bottom.
You can access these alignment options by selecting the objects you want to align and then navigating to the Home tab in the PowerPoint ribbon. From there, click on the Arrange group to access the different alignment options.
Different types of PowerPoint objects
You can align PowerPoint objects of several different types, including shapes, text boxes, and pictures or images.
It is possible to align a single object with other objects on the slide, or you can select multiple objects and align, e.g., the left edges or top edges of the grouped objects.
Built-in align options
Using the built-in align options in PowerPoint makes it easier to create a beautiful presentation. It is very time consuming to manually align objects and almost impossible to make sure all edges align. Often you want to precisely position objects horizontally or vertically, or you want align a shape with another shape or with a text box.
Learning the commands that aligns objects for you automatically will not only make it much quicker for you to produce slides, it will likely also save you a ton of frustration!
To save extra time when accessing an align command, you can even add the options to arrange objects to the quick access toolbar and have them available directly on your screen all the time.
Aligning Shapes Using the Grid and Smart Guides in PowerPoint
PowerPoint has a grid and smart guides that can help you align objects with precision.
To access the grid, click on the View tab in the PowerPoint ribbon and then click on Gridlines in the Show group. Once you’ve enabled the grid, you can use it to align your objects by dragging them to the desired location on the grid.
The grid will snap the objects into place, ensuring they are aligned properly.
PowerPoint also has smart guides that can help you align objects. Smart guides are dynamic lines that appear when you’re moving objects around on the slide. They can help you align objects with other objects or with the slide itself.
To enable smart guides, click on the View tab in the PowerPoint ribbon and then click on Guides in the Show group.
Once you’ve enabled smart guides, you can use them to align your objects. As you move an object around the slide, the smart guides will appear to help you align it with other objects or the slide itself.
Here’s some steps to follow to align objects using the grid and smart guides:
Click on the View tab in the PowerPoint ribbon
Click on Gridlines in the Show group to enable the grid
Drag the objects to the desired location on the grid to align them
The grid will snap the objects into place, ensuring they are aligned properly
Click on Guides in the Show group to enable smart guides
As you move an object around the slide, the smart guides will appear to help you align it with other objects or the slide itself
Use the smart guides to align selected objects with other objects or with the slide itself
Use the arrow keys on your keyboard to nudge objects into place if needed.
Aligning Objects Using the Align Tools in PowerPoint
PowerPoint also has a set of align tools that can help you align selected objects quickly and easily.
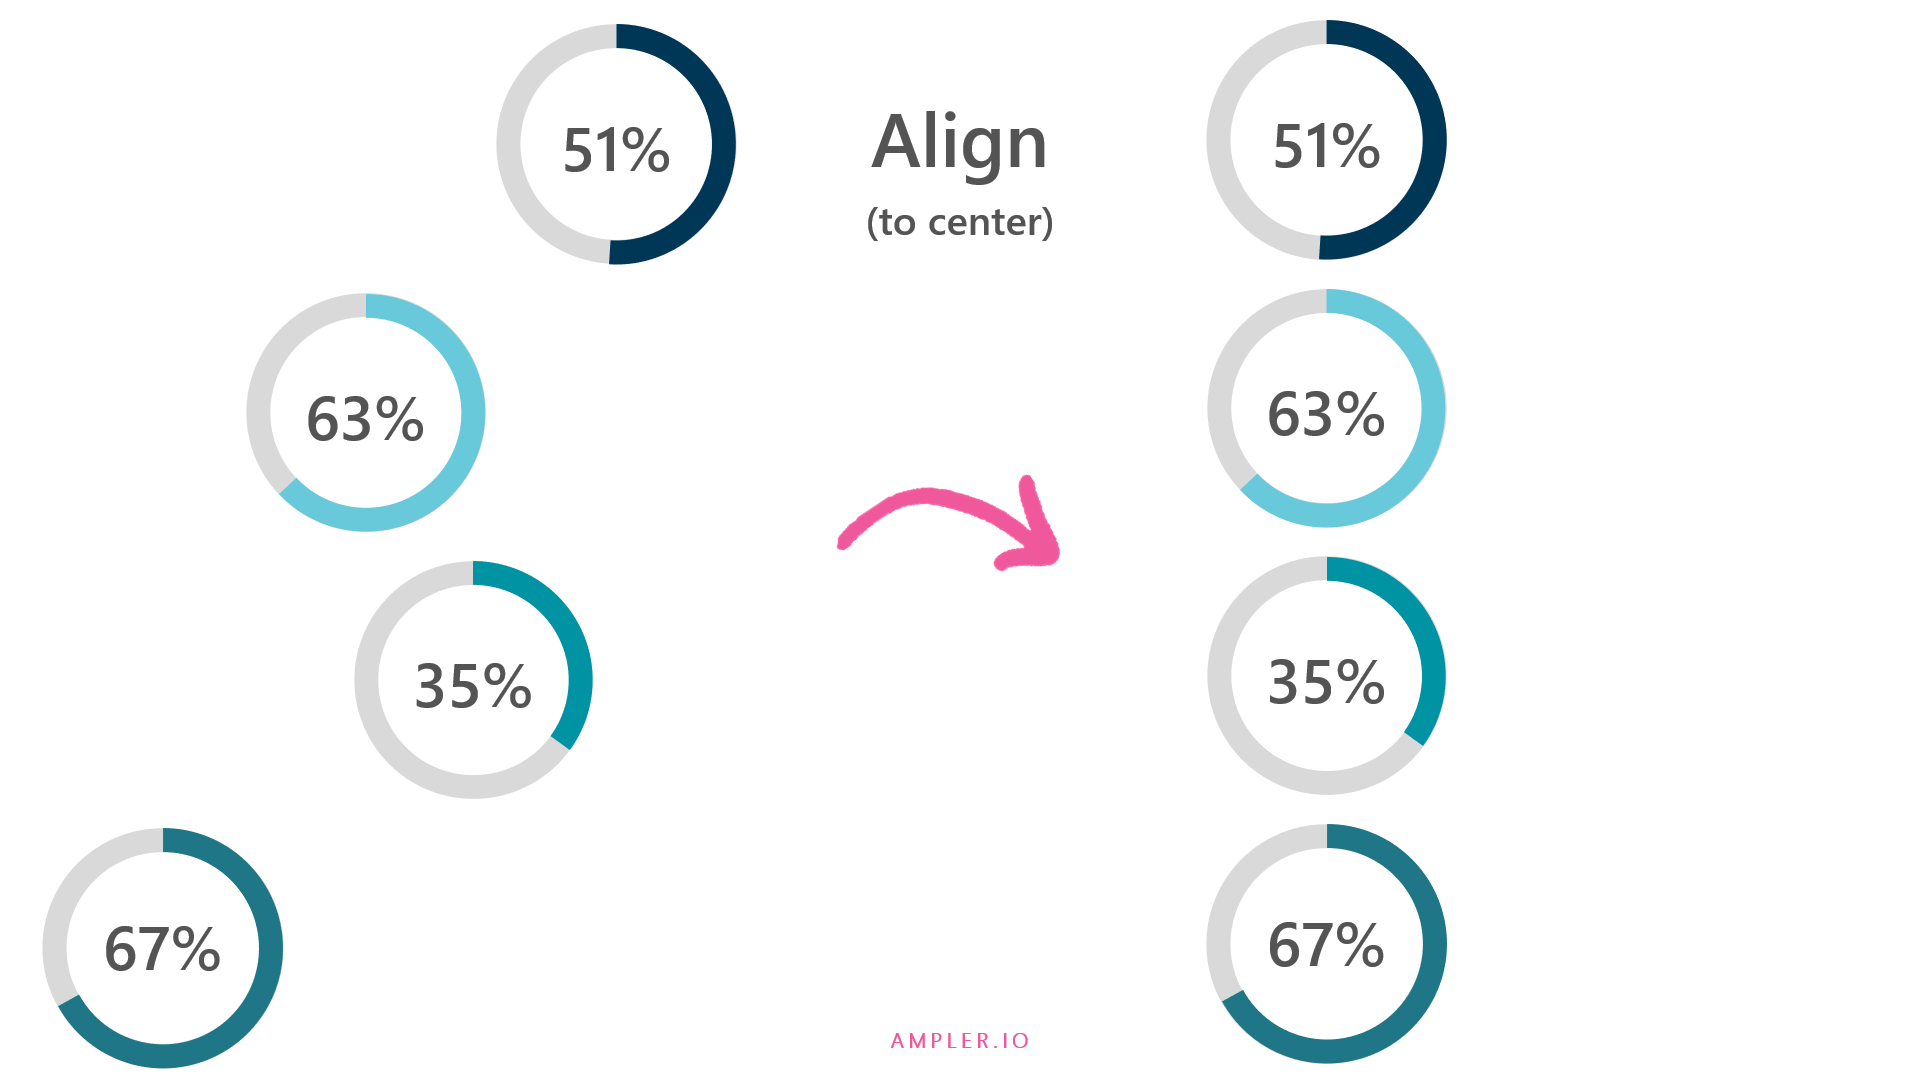
To access these tools, click the objects you want to align and then click on the Format tab in the PowerPoint ribbon. From there, click on the Align drop down menu and then select the desired align option, such as Align Left, Align Center, or Align Right.
Here are the steps to align objects using the Align Tools in PowerPoint:
Select the objects you want to align.
Go to the Format tab in the PowerPoint ribbon.
Click on the Align drop down menu.
Select the desired align option, such as Align Left, Align Center, Align Right, Align Top, Align Middle, or Align Bottom.
The objects will be aligned according to the selected option.
Distributing Objects in PowerPoint
In addition to aligning objects, PowerPoint also has tools for distributing objects evenly. This can be especially helpful when you’re working with multiple objects of different sizes and want to ensure they are evenly spaced.
To distribute objects in PowerPoint, select the objects you want to distribute and then navigate to the Format tab in the PowerPoint ribbon. From there, click on the Align drop down menu and select Distribute Horizontally or Distribute Vertically.
Here’s how you can distribute objects in PowerPoint:
Select the objects you want to distribute
Go to the Format tab in the PowerPoint ribbon
Click on the Align drop down menu
Select either Distribute Horizontally or Distribute Vertically
PowerPoint will evenly space the selected objects either horizontally or vertically
Adjust the spacing between the objects by dragging the shapes or using the arrow keys on your keyboard
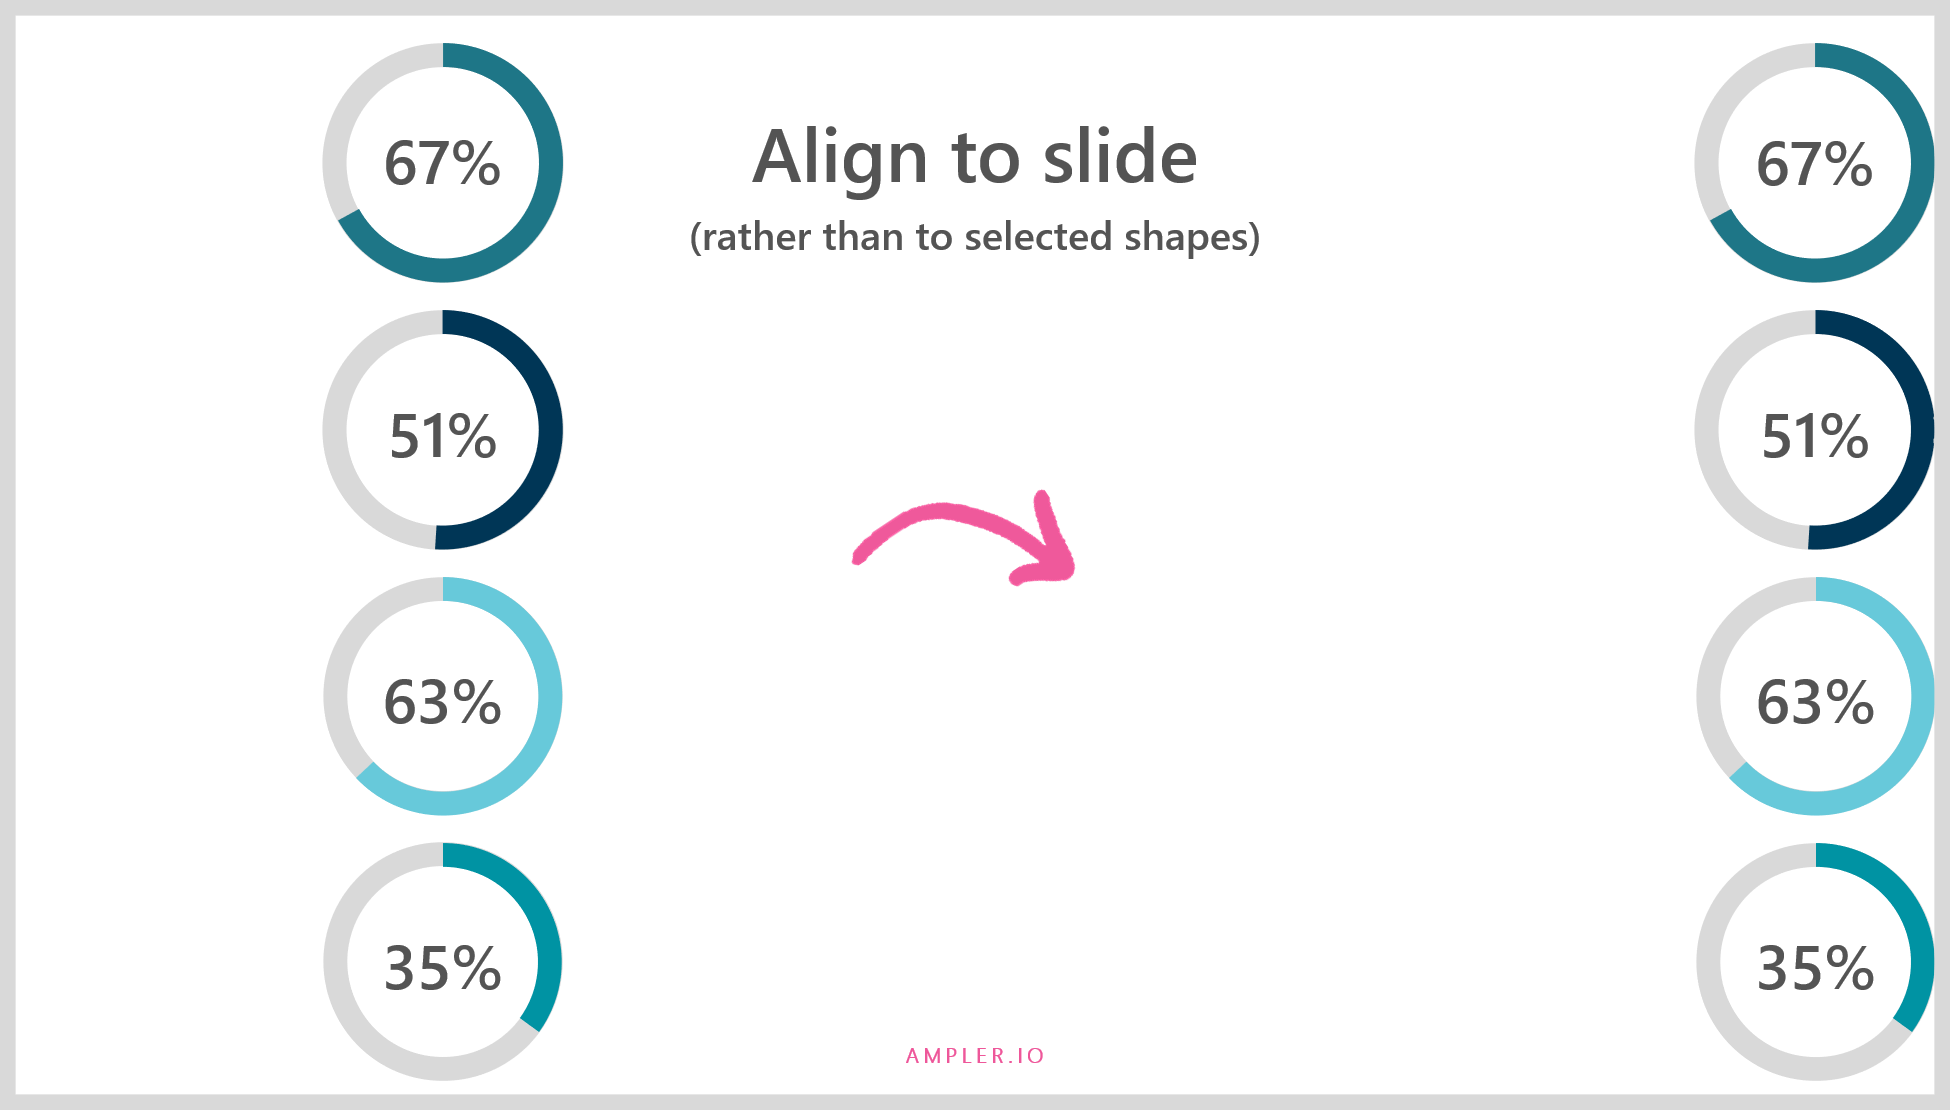
Use the Align to Slide option to align the distributed objects with the left or right edges or center of the slide if desired.
Tips for Aligning Objects in PowerPoint
Now that you know how to align objects in PowerPoint, here are a few tips to keep in mind to ensure your presentations look polished and professional:
Use the grid and smart guides to align your shapes with precision.
Consider the alignment of your shapes in relation to the slide itself. For example, you may want to align your shapes with the slide’s margins or center point.
Use the distribute tools to ensure that your shapes are evenly spaced and don’t overlap.
Be consistent with your alignment choices throughout your presentation to create a cohesive and professional look.
Take advantage of PowerPoint’s grouping and layering tools to further organize and align your shapes.
Conclusion
Aligning shapes in PowerPoint is a simple but essential step in creating clean and organized presentations. By using the alignment options, grid, smart guides, and distribute tools available in PowerPoint, you can achieve a polished and professional look without needing to be a designer.
Remember to keep these tips in mind as you work on your presentations to ensure your shapes are aligned properly and your message is communicated effectively to your audience.
Looking for an easier way to align shapes in PowerPoint?
Look no further than Ampler!
Our product offers automatic alignment options that save you time and ensure that your shapes are perfectly aligned every time.
With just a few clicks, you can align multiple shapes at once and achieve a professional look in your presentations.
Check out our tutorials on automatic alignment in PowerPoint to see how Ampler can make your presentation creation process even easier.
This website uses cookies in order to improve the user experience. When you continue to use this site, you accept the use of cookies. Read more about our cookie policy here.